In Current Society, with the development of plastic injection technology, a lot of plastic products spread the market at home and abroad, even more, people found that many plastic products can replace some metal products and wooden furniture. But also the cost of plastic products are far lower than other material products. With more and more plastic product factories have been built, Various plastic injection moldings are developed largely. So plastic molding tools design and making also becomes more and more popular.
Overview Of Plastic injection Molding
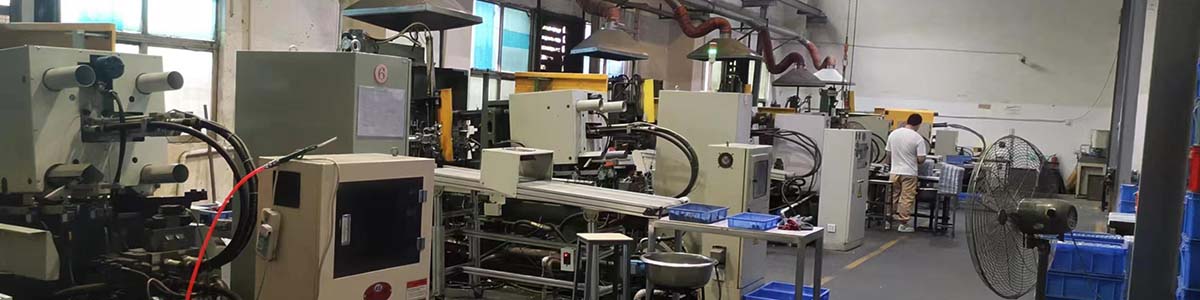
Before beginning Plastic Molding Tools Design and Making, we should learn more about plastic injection molding, which is a widely used manufacturing process,which produces parts by injecting molten plastic material into a mold under high pressure, and cooling and solidifying and eject the formed plastic part from the mold. It can in high efficiency produce complex shapes in large quantities. This makes it one of the most popular methods for manufacturing plastic products in industrial process. Exception for plastic molding process, some custom die casting process is also our main production capability.
Plastic Molding Tools Design And Making
The plastic molding tools design and making is precision-engineered process. The tools are designed, processed and assembled and become precision plastic injection molding tools which can produce the desired shape plastic parts in large volume in high efficiency. The mold contains of two halves: Cavity(decide the appearance of part) and Core (hollows, ribs, or inserts). Added cooling channels, overflow vent, ejector pins. Our well-experienced engineering team using preminum design software to design all molding tooling components and deliver our well-experienced mold technician to manufacture high precision plastic injection molding tools. The plastic molding tools design and making is complex and challengable process.
Injection Molding Machine Components
The plastic molding tools design and making includes of the below key components.
| Components | Detail |
| Hopper | Holds the raw plastic material, prepare for plastic material ahead |
| Heated barrel and spiral | The plastic particles are fed into a heated barrel, where they are melted. A spiral inside the barrel rotates to push the molten plastic forward toward the mold. |
| Nozzle | Through a nozzle,the molten plastic is forced into the mold . |
| Clamping Unit | This mechanism controls the two halves of the mold close and open. After the molten plastic is injected into the mold, ensuring the mold remains tightly closed under pressure |
| Ejector Pins | After the part solidifies, ejector pins push the finished part out of the mold quickly |
The Injection Process
Firstly We fix the two halves of the mold and clamp the mold together with hydraulic pressure. Next step, The hydraulic piston pushes molten plastic into the mold at high pressure until the melton plastic filling the civity completely. Then the mold is cooled ,The plastic solidifies into the desired shape in the mold, the mold opens, and the part is ejected out of the mold. The mold closes for the next cycle.

Types of Plastics Raw Material
These thermal plastic material used in injection molding is considered when the plastic molding tools design and making begins.
- Polyethylene (PE)
- Polypropylene (PP)
- Acrylonitrile Butadiene Styrene (ABS)
- Polycarbonate (PC)
- Nylon (PA)
Design For Plastic Molding Tools
When we start the action of plastic Molding Tools Design and Making, Designing plastic injection molding tools is first task, which requires careful considering of several factors that impact manufacturability, part quality, mold cooling mechanism and the core and cavity surface finish. To avoid defects like warping, sink marks, or short shots in plastic injection molding process, we should optimize cooling mechanism of the mold and the surface finsh of the core and cavity.
The high quality injected parts and low defects rates of the production. We sugguest that manufacturer should have a mature engineering team and well-experienced designers collabrate working each other and finish the project design. We must consider ofThe bellow issues carefully during designing plastic injection molding tools.
No.1: Wall Thickness
Keep wall thickness even thick throughout the part. Maitain even flow of molten plastic, uniform cooling, and minimize internal stresses and prevent the part deform from the uneven temperature. With our mature design experience, wall thicknesses range from 1.5 to 5 mm. Over 5mm, may cause long cooling times and wrapping.
No.2: Draft Angles Strategy
Proper Draft angles help ejecting out the part from the mold smoothly without sticking or damage. The part can come out from the mold smoothly and without the damage of edges and corners. Our kindly advise that 1° to 3° of draft angles per side for smooth surfaces is ideal.we should design the proper draft angles for the mold.
No.3: Rib and Boss Design
Ribs and bosses can enhance the plastic part internal structure strength without significantly increasing wall thickness. Ribs must be no more than 2.5-3 times of the wall thickness,which avoid sink marks and long cooling times during plastic injection molding process. But boss wall is no more than 60% of the nominal wall thickness. To reinforce bosses, surporting ribs is neccessary.
No.4: Undercuts and Parting Lines
Undercuts can prevent straight ejection from the mold. This will increase the mold design difficulty, which is added side actions or slides to release the part from the mold. To create more strong internal structure and some sepecial functions of the plastic part, Undercut design is available. Such as interial and external threads,snap fitting and complicate geometries design. Carefully position parting lines on the surface of plastic part,without impacting the appearance or minimizing the flash during injection molding process.
No.5: More Through Pillar Provide Multiple Axes Holes
Holes in the part may lead to more complexity of the plastic molding tools, especially if the holes are on multiple axes. Where installes more core pillars to creat these holes. meanwhile these core pillars are aligned with the mold opening . The texture that don’t place holes near the edges of the part, damage the structure integrity of the plastic part.
No.6: Corners and Fillets
Round corners in injection molding can disperse stress concentrations, maitain good material flow,and avoid the part stick the mold and can’t eject out from the mold after opening the mold. The radius of the corner should be 0.5 to 1.5 times the wall thickness. Using chamfers or round edges design to improve smoothness of ejection. This is revalent to the draft angles strategy closely.
No.7: Gate Location and Type
Gates are the entry points that inject molten plastic into the mold cavity. Their location and type of gates can affect part quality. Gates locations decide if the molten plastic is even filling the cavity and vent out the trapped air and form an integrated stability of the part . Hot Runner supports More complex, but requires maintaining the material flow at a higher temperature.
No.8: Cooling System Design
Effective cooling mechanism can reduce cycle time and avoiding defects like warping or sink marks during plastic injection molding process. Design proper cooling channels are indispensible for plastic injection molding tools. Ensure even cooling throughout the mold after fully even filling the molten plastic throughout the mold. And avoid uneven cooling on the part ,and make the part warping and shrinkage.
No.9: Ejection System
Reasonable ejection system can eject the part out of the mold after cooling smoothly in a few seconds, and reduces the risk of sticking the mold and part damage. Place pins in right positions makes won’t leave visible marks on the part or deform the part. Design enough draft angles for bosses and ribs to prevent sticking the mold and damage of the part.
No.10: Texturing and Surface Finish
Surface textures can be added for aesthetic or functional purposes of the plastic part. According the requirement of part’s suface, engineer will design surface textures on the core of the mold. Maybe glossy parts, matte finish and stamping texture created.
Plastic Molding Tools Manufacturing Guide
When excuting the action Plastic Molding Tools Design and Making, manufacturing plastic injection molding tools involves a series of precise processes. It includes of the mold material, the mold manufacturability and its cost. The processes require advanced machining techniques, high-quality materials, and strict complying with design drawing. Let us to have an overiview of the steps for manufacturing plastic injection molding tools to everyone.
1. Material Selection for Mold
The mold material must withstand high injection pressures and repeated thermal cycling. Tooling steel is the best choice, if low-volume or prototype molds. aluminum material is considered availabe. In general term, Steel Molds are durable and repeatable, they are used for high volume production. We suggest that the below material as your choice.
P20 Steel belongs to Pre-hardened steel, commonly used for injection molds.
H13 Steel is Air-hardening steel and has excellent toughness, used for high-pressure or high-temperature molds.
Stainless Steel is possiblely Used in molds that prevent corrosion resistance from some corrosive material like PVC.
Aluminum Molds are lighter, easier to be machined, and suitable for prototype molds or a low volume production.
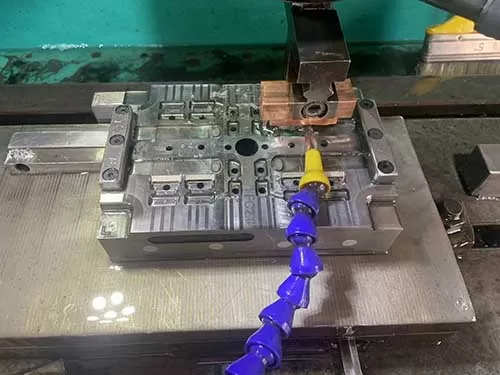
2. Machining the Mold Components
After the design and material selection,according to the designed drawing of the mold, the mold components such as core, cavity, and supporting components are machined. These components are all high precision, and require cnc machining process to finish.
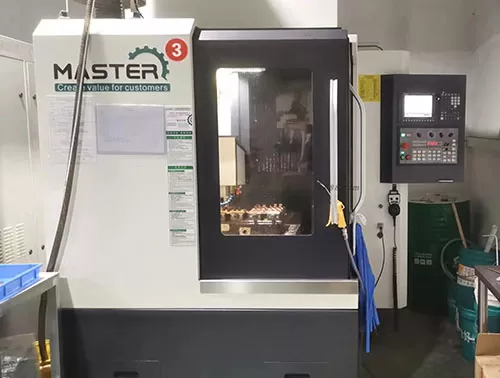
1. CNC Machining
Large portions of the mold are shaped using high precision CNC milling machines. the core and cavity of the mold will be formed here. The mold base holds the core and cavity and is machined to fit the mold components accurately.
2. Electrical Discharge Machining (EDM)
EDM (or spark erosion) is used to create complex geometries. It also create sharp corners, deep cavities, and intricate details of the cavity. By electricity spark, and achieve supper high precision process for the mold.
3. Gun Drilling
Cooling channels, which control the mold temperature during production. These cooling channels are made by through hole drilled on the mold using specialized deep-hole drilling machines. Through water and oil, cycle inside cooling channels, provide a quick even cooling when the part solidifying.
4. The Mold Surface Finish
To have a desired surface result on the plastic part, the surface of the core and cavity of the mold accept grinding and polishing, keep proper alignment and seamless halves closing of the mold and minimizing flash of the part line. The below includes two types surface finishes. For high-gloss parts, the mold surfaces are polished to achieve a mirror finish . This ehances the appearance of the final part and ensures smooth ejection from the mold. For parts that want to a matte or textured finish, Engineers can etch and sandblast the suface of the mold to create the desired texture.
5. Mold heat treatment
To enhance the wear resistance of the mold, the mold should be heated by quenching and increase hardness of the surface of the cores and cavities of the mold. This makes the sufaces more wear resistance and withstand more repeatable action frictions during fast cycle injection actions. And produce more high quality qualified plastic injection parts and reduce mold maitenance and repair cost in high volume quantity production.
3. Assembly And Testing of the Mold
When finishing all the components machined , we will assemble the mold. Mounting the core on the male half of the mold, fix the cavity on the female half of the mold, and install the mold on the chassis of plastic injection machine, and assemble relatant components like ejector pins, sleeves on the area of the mold, connect to cooling channel with pipe and screws, and built a cooling system. Then begin alignment with two halves of the mold, adjust them position unitl the mold can run smoothly.
After assembly, the mold is tested in a process called mold trials to verify that it produces parts according to specifications. We should do the follow steps to verify the performance of the mold. The mold mounted in an injection molding machine has a trial testing. Feeding some plastic into hopper, start the plastic injection machine, begin first injection plastic molding test. Based on the trial results, optimize the mold’s performance. It involves of modifying gate locations, adjusting cooling channels, or fine-tuning ejector systems. Unitil this time, we have finished the plastic molding tools design and making successfully. hand them to productive shop for mass production in high efficiency.
Conclusion
Finding out from the above, Plastic Molding Tools Design and Making is a complex and intricate procedure. From designing the mold to make a fully set of plastic injection molding tools, it needs enrich design experience and professional design conception designer and skilled-well technician who operate the precisoin cnc machine equipment. Designers should consider of these factors that impact manufacturability, part quality, mold cooling mechanism and the core and cavity surface finish when they begin design the mold of plastic part, Afterwards, Techinican process the according mold components ,then asseble the mold and test. And keep continuously improve and repair the mold until the mold can inject the qualified plastic part to meet client requirements.